


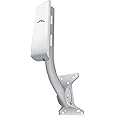


First let me say that I design and implement networks as part of my professional career and I have used Ubiquity’s products multiple times with great success. But, before you start reading my long review you should make sure that this type of product is a good fit for you. This device will create a wireless network bridge between 2 locations that are up to 10 miles apart as long as there is clear line of sight between the 2 locations. This means that you will need 2 of these devices in order to install one on each location. I say clear line of sight because if you have geographical line of sight but you also have trees full of leaves between these devices, you will find that the signal and connection will be bad until those trees drop their leaves and if you want good connections all year round you may have to mount these devices at higher locations like on a poll on your roof. To verify that you have good line of sight and hills or other obstacles are not in the way, Ubiquity offers a very useful tool at link.ubnt.com where you can select the locations on a map and it will tell you the distance, if line of sight is obscured and even what signal levels and network bandwidth capacity you should expect.
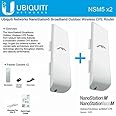
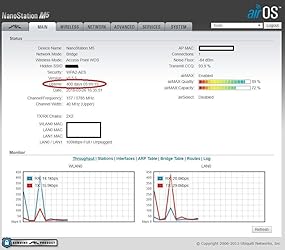
If you still believe that this is the product you need for your network application let me tell you that these NanoStation M5 units are very cost effective and high quality that comes close to competitors that cost hundreds of dollars more. I have installed them between buildings and not only they have been working flawlessly and care free for years, but I even use them to connect IP phones from one building to another and there are no latency issues provided that signals are better than -80dBm (at -70dBm you are golden). These are so stable that we install them and almost forget about them. As a matter of fact, in the attached image, you can see that the up time of one of these is 400 days at the time of this review which means that winter weather did not affect it at all (2 winters in 400 days) and it is installed in the northeast region of the US. The reason I know that the connection is stable is because on the other side of it, it services 2 of our businesses where we have multiple PCs, a server, 3 wireless access points for the user laptops and 11 IP phones. Any connection issues and our IT department would have been getting a lot of calls immediately.
Terminology:
1) “Access Point” is the unit that is on the side of the existing network which we want to extend.
2) “Station” is the unit that connects wirelessly to the Access Point and provides network service to the remote location.
Features:
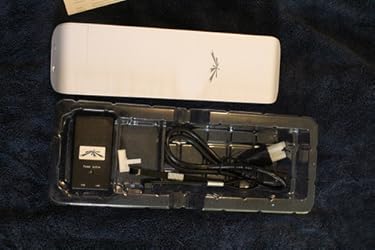
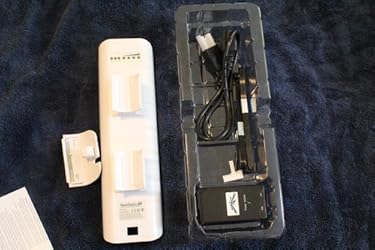
1) They are easy to install as long as you have a shielded CAT 5 cable going from your router location to the location of the NanoStation M5.
2) They are POE and you will not need to run power cables to them
3) They have a “Settings Test” mode where you change settings and the device gives you 2 minutes to make them permanent. If you do not confirm that all is well in 2 minutes, they revert to the previous settings so you can regain access.
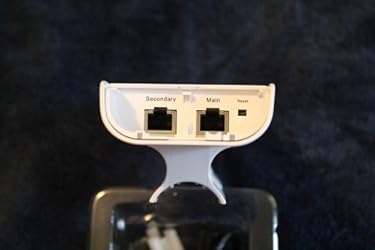
4) You can reset them to factory defaults from their POE power injector so you do not have to go up on the roof or other hard to reach locations to find the physical device and reset it.
5) The Station, can provide a POE connection to an IP camera or other device like a WiFi access point directly from the second LAN port.
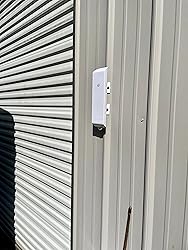
6) They are small, light and easy to mount with tie wraps
7) The Access Point can also provide WiFi service at the location that it is installed.
8) They support VLANs
Set up:
To set up a bridge, first set them both with a static IP on your network. You can use DHCP with a reservation on your DHCP server or even without reservation but using a static IP (still reserve the IP on your DHCP server) allows you to access them even if your DHCP server (typically your router for home users) is down. I will not go in the details of installation and setting up the IPs because you can get that from the installation guide that comes with the device. One thing I want to emphasize is that you need to use shielded CAT5 to protect your network equipment. Having said that I will attempt to guide you through the settings for getting the bridge up and running. To do so, I suggest that you get 2 of these devices in a fairly large room and point them at each other. Once you get them to communicate and work as a bridge, you can then mount them at their permanent locations and start working on improving signal levels if necessary. Note that in order to set up a bridge, we will have to make one the access point and the other the WDS station.
The following steps assume that you were able to login to these devices already.
1) Login to the one that will be the “Access Point”. This one will be on the side that your network already exists and functions properly. For example, if you are trying to expand your network from building A that already has Internet service to building B that you would like to provide Internet to it, the Access Point will be installed on building A.
2) Go to the Network Tab and make the following adjustments:
--- a) Network Mode: Bridge
--- b) Disable Network: None
--- c) Configuration Mode: Simple
--- d) Management IP Address: Static (If you choose DHCP you can skip the rest but I suggest that you make a reservation in your DHCP server so you can always know the IP of your device (routers act as DHCP servers for home networks).
--- e) IP Address: An available IP on the Network. Ex. 10.0.0.2
--- f) Netmask: 255.255.255.0 (For networks that have 255 available IPs (Ex. 10.0.0.1 to 10.0.0.255). If your network has more IPs than that I assume you know the mask you need to use.
--- g) Gateway IP: Your router’s IP (typically 10.0.0.1)
--- h) Primary DNS: Check your router and provider
--- i) Secondary DNS: Check your router and provider
--- j) MTU 1500
--- k) If you are not familiar with terms like VLAN, IP Aliasing and STP, just leave those check boxes unchecked.
3) Go to the Advanced Tab and change the distance. This will adjust the output power of the unit and believe me this is not a muscle car so you really don’t want too much power. Excessive output power will actually degrade performance. Try setting it to the actual distance between the devices.
4) Go to the Wireless tab and select the following:
--- a) Wireless Mode: Access Point
--- b) WDS (Transparent Bridge Mode): Enable
--- c) SSID: Type an SSID like “MyBridge” and I suggest that you check the “Hide SSID” box
--- d) Country Code: Select your country
--- e) IEEE 802.11 Mode: A/N mixed
--- f) Channel Width: 40MHz
--- g) Channel Shifting: Disable
--- h) Frequency: This is tricky. You can select Auto but I like to select a specific frequency depending on the spectrum analysis. You can get a spectrum analysis by going to the Main tab and select “Launch Air View” but for now you should leave it on Auto and run the Air View when the device is mounted on the permanent location.
--- i) Under Wireless Security select Security: WPA2-AES, WPA: PSK and enter a WPA preshared key.
5) Login to the other device that will be the Station. This will be mounted on Building B which is the building that has no network.
6) Go to the Network tab and select the following:
--- a. Network Mode: Bridge
--- b. Disable Network: None
--- c. Configuration Mode: Simple
--- d. Management IP Address: Static (If you choose DHCP you can skip the rest but I suggest that you make a reservation in your DHCP server so you can always know the IP of your device (routers act as DHCP servers for home networks).
--- e. IP Address: An available IP on the Network. Ex. 10.0.0.3 (different than the Access Point above)
--- f. The rest of the settings are the same as the Access Point. See 2.f to 2k above
7) Set the distance in the Advanced tab as you did in step 3
8) Go to the Wireless tab and select the following:
--- a) Wireless Mode: Station
--- b) WDS (Transparent Bridge Mode): Enable
--- c) SSID: Type the same SSID you typed in step 4.c (“MyBridge”)
--- d) Country Code: Select your country
--- e) IEEE 802.11 Mode: A/N mixed
--- f) Channel Width: Auto 20/40MHz
--- g) Channel Shifting: Disable
--- h) Under Wireless Security select Security: WPA2-AES, WPA: PSK and enter the same WPA preshared key that you entered on the Access Point.
You are all set. To test, connect the Access Point to your network switch or an open router port and connect your computer to the LAN 0 of the Station (of course you need to use the POE injectors). Your computer should be able to get an IP and be part of the network that the Access Point is connected to.
Finally I would like to say that I highly recommend the Ubiquity products and you should give this a try before looking elsewhere as long as it fits what you want to accomplish.
| RAM | 32 MB |
|---|---|
| Wireless Type | 5.8 GHz Radio Frequency |


